
How to Customise Your Squarespace GDPR Cookie Banner

Ah, cookies. Sweet, sweet cookies 🍪
Unfortunately today we’re not talking about the chocolate chip kind.
(But feel free to raid your snack cupboard before you continue reading this!)
No, we’re talking about the GDPR type of cookies.
GDPR took the website world by storm in 2018 when it became a requirement to be transparent about using cookies to track your website visitors as they navigate through your site.
What is a website cookie?
Put simply, a website cookie is a small piece of data created by a web server whilst a user is hanging out on a website. This data is placed onto the user’s computer to help a website remember information about the visit. This might be through tools like Google Analytics or Squarespace Analytics, for example. As website owners, this means we can customise the website to users, save their data to make it easier for them to use and analyse key trends to improve the website and our marketing efforts.
But, understandably, users want control over whether they agree or disagree to their information being recorded and tracked.
Step in: GDPR and a cookie banner 🙌
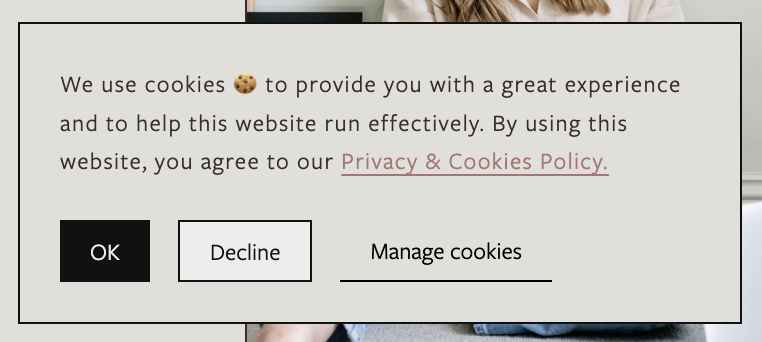
As you’re browsing the internet, you’ll notice websites now have a little pop-up box that informs you that cookies are being used on this website. On this, you can have the option to accept, decline or manage your cookie preferences.
So, we definitely want this on our Squarespace websites. But how do we add it and customise it to keep it looking perfectly on brand and a seamless part of your design? Keep scrolling…
Note: Last updated July 2024 to work with Squarespace’s SS 2024 cookie update
How to Set Up Your Cookie Banner
The pop up banner is very easy to enable and add to your site.
Simply head into your Squarespace site panel and click Settings > Cookies & Data Privacy and toggle on Cookie banner.
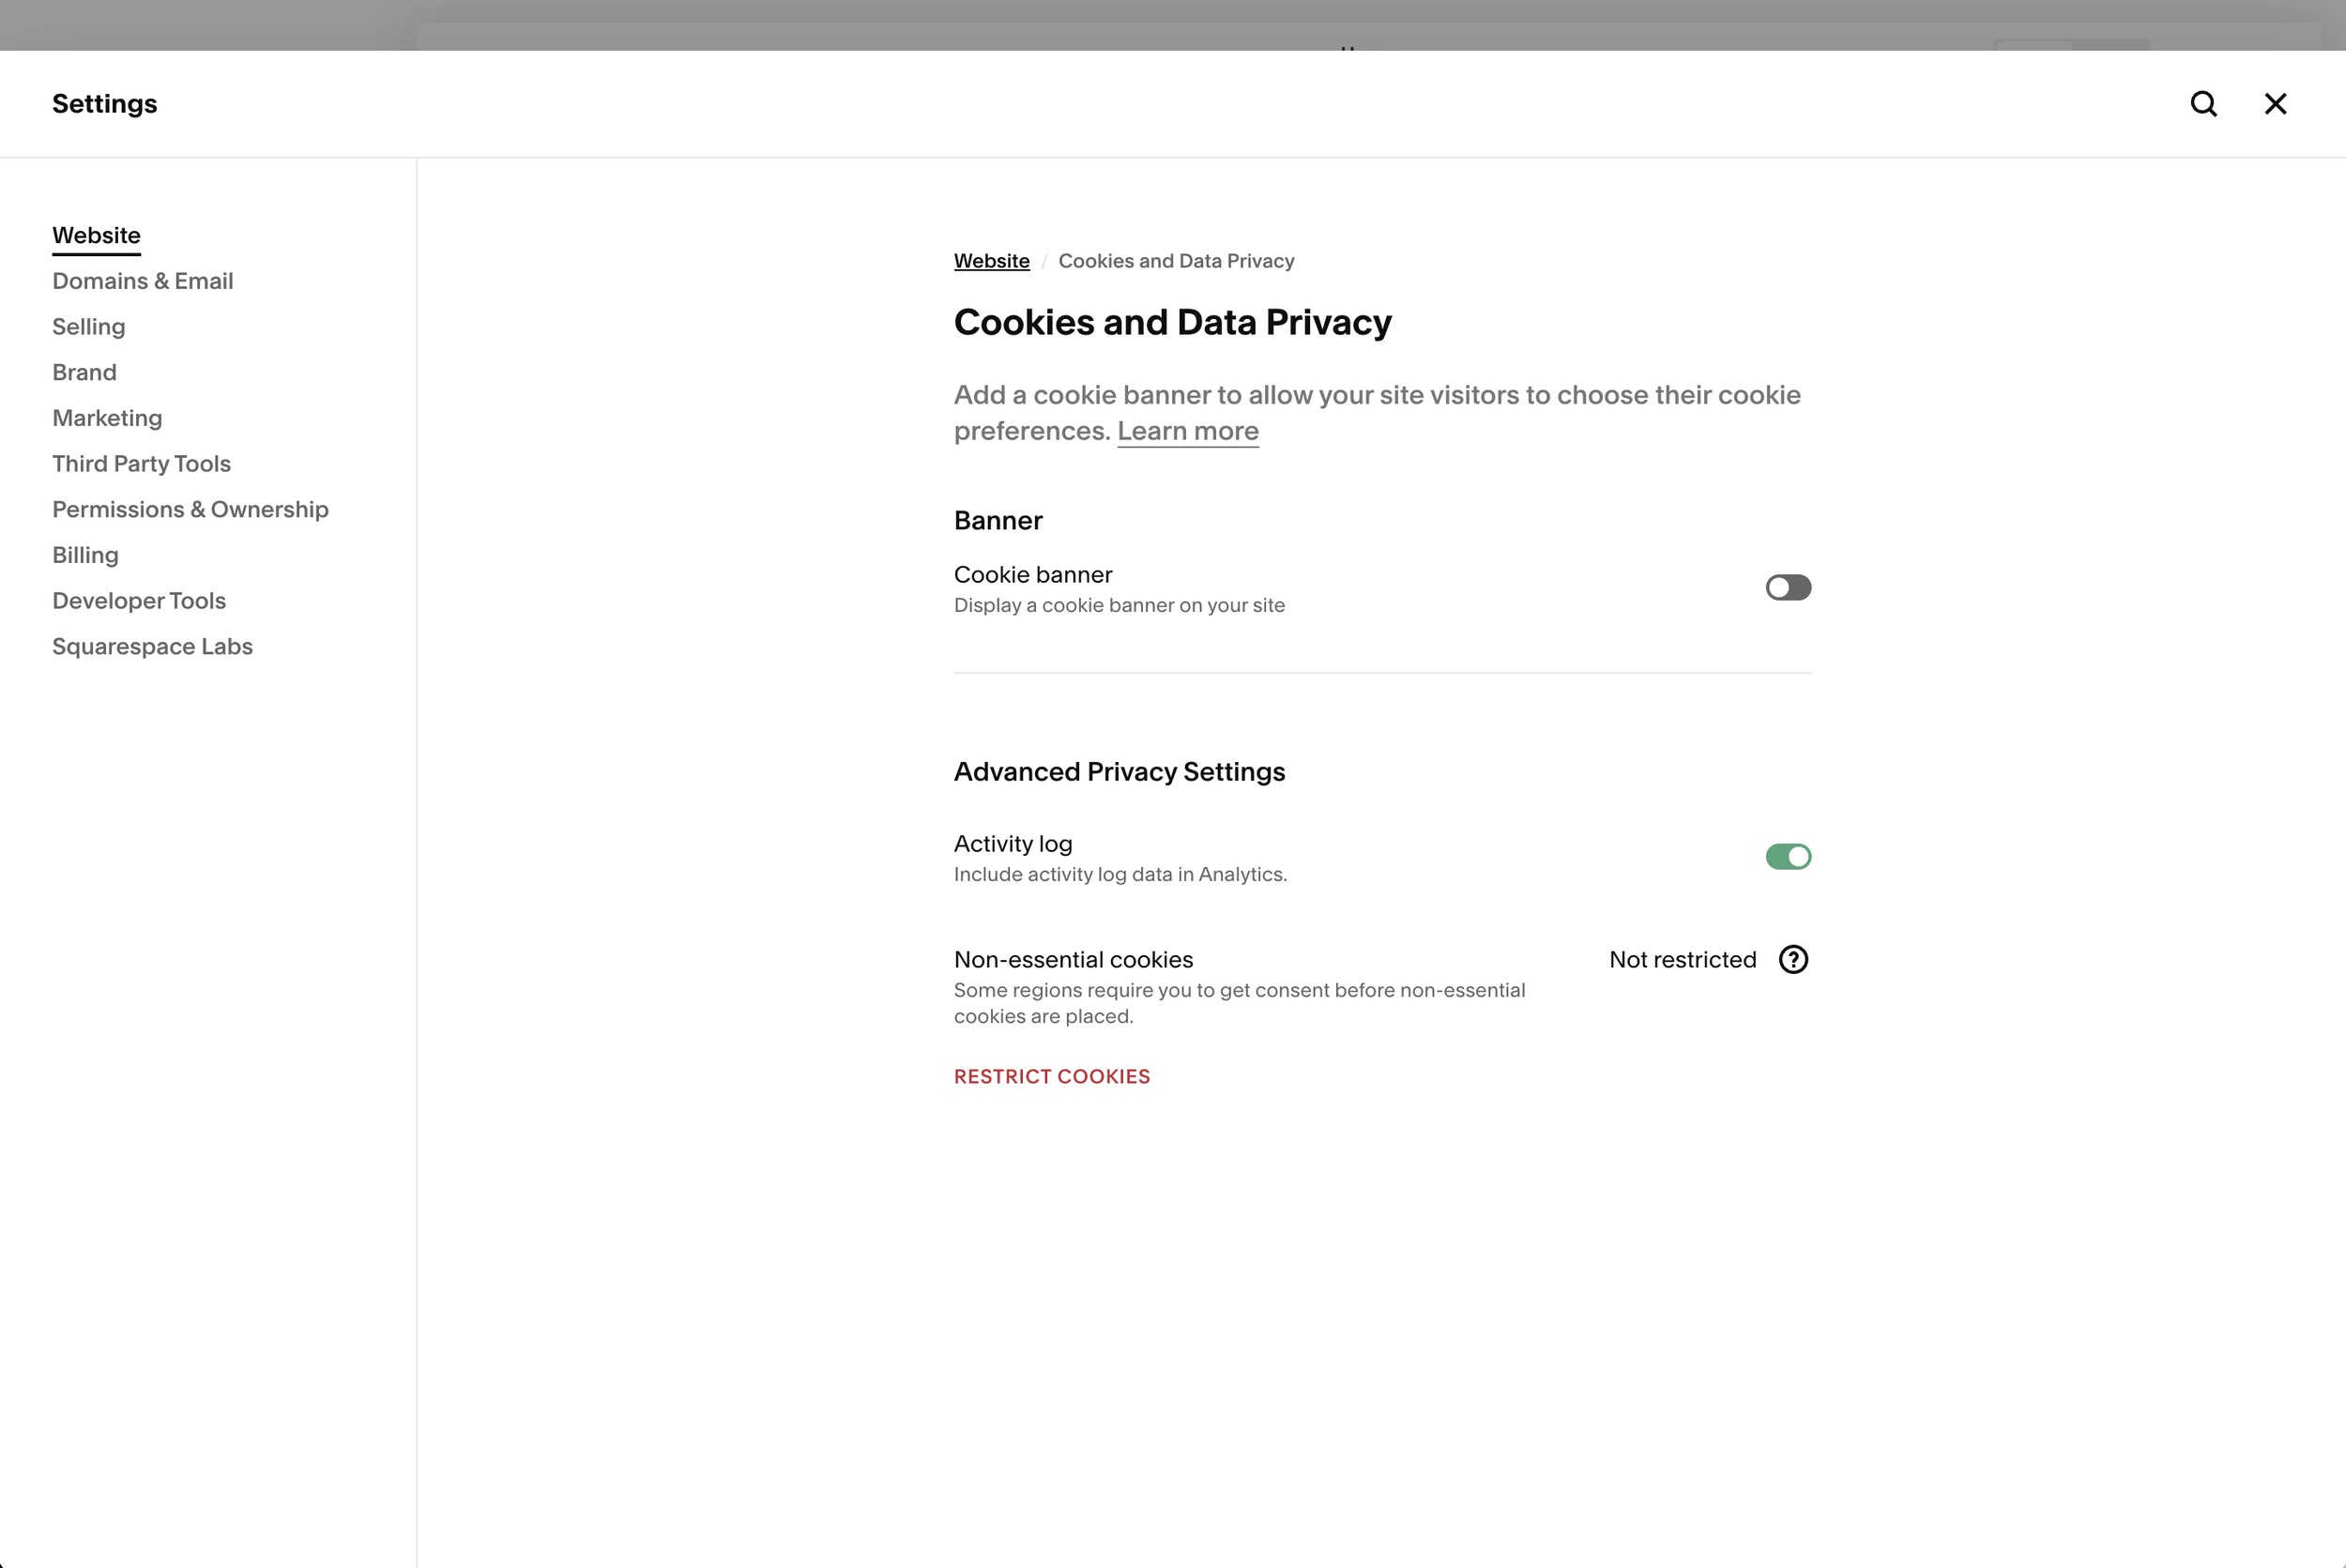
Scroll down a little further and under Banner Text you can change the wording for your cookie pop up. Type to change the Accept Button Label, Manage Cookies Button and Disclaimer Text. The Disclaimer Text is the short paragraph that will appear on the pop up explaining the cookies and choices. Feel free to add some personality in with your word choices here.
On this page, you also have the option to customise some of the structure of the pop up. Toggle on/off a Decline All button which will offer the option for visitors to decline non essential cookies or the Manage Cookies button which will allow users to manage what cookies they accept.
You can also scroll down to the bottom of the page to edit the saved preferences and activity log.
Now hit Save.

After saving, scroll to the top and click Customise Banner Style. This opens up some settings in your Style Editor.
From here you can select the colour theme you’d like from the dropdown. The cookie pop up will pull through your background, paragraph and various button colours to create the style.
You can also edit the placement of your cookie pop up to sit in a corner or along the bottom of the page.

How to Customise the Squarespace Cookie Banner Further with Code
Now if these changes aren’t enough for you and you’d like to take the customisation to the next level, we can add in a snippet of code to elevate the design.
Just copy and paste the code sections into your Custom CSS by heading into Website > Pages > Website Tools > Custom CSS, replacing the #ffffff and #000000 with your unique hex colour codes.
//---Paragraph and Links---//
.cookie-banner-mount-point p.disclaimer-text {color: #000000 !important;
font-family: open sans;
font-size: 13px;
font-style: normal;
font-weight: 300;
line-height: 1.2rem;}.cookie-banner-mount-point p.disclaimer-text a { color: #ffffff !important;
border-bottom: none !important;}.cookie-banner-mount-point p.disclaimer-text a:hover { color: #000000 !important;}//---Background and Border---//
.gdpr-cookie-banner {background: #ffffff !important;
border: 1px solid #000000;
padding: 20px;}//---Accept Button---//
.accept.sqs-button-element--primary {font-family: open sans;
border: 1px solid #000000 !important;
background: #ffffff !important;
color: #000000 !important;
font-weight: 300 !important;}//---Decline Button---//
.decline.sqs-button-element--secondary{ font-family: open sans;
border: 1px solid #000000 !important;
background: #ffffff !important;
color: #000000 !important;
font-weight: 300 !important;}//---Manage Preferenes Button---//
.manage.sqs-button-element--tertiary { font-family: open sans;
border-bottom: 1px solid #000000 !important;
background: #ffffff !important;
color: #000000 !important;
font-weight: 300 !important;}//---Buttons All---//
.gdpr-cookie-banner.full-styling button { padding-top: 5px !important;
padding-bottom: 5px !important;
line-height: 1.2rem;}Remember! Make sure you don’t remove or edit the “!important;” or “;” between the lines or the code won’t work properly.
Add in your own colours and information above and you might end up with something a little bit like this:
Suuuuuper excited for you to marry functionality and beauty on your site using this quick fix!


